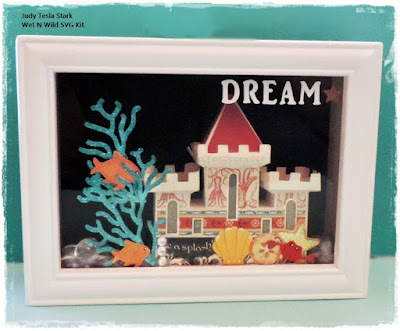
I am having such a great time using shadow boxes, svg files, cardstock & vinyl! It takes me to an earlier time of my life, playing with a playhouse etc. I do mean, WAY BACK! I craft almost daily and many times I give away my completed items. I have to or plan on the clean-up crew of the Hoarders show arriving here! LOL To preserve my work and enjoy it, the shadow box seems perfect! The boxes above are 5" by 7" and 2.75" thick. I bought these at my local Michael's store while on sale at 50% off. Around $5.00 each and the brand is Studio -Decor.
VERY nicely made and secure. They also include a Velcro strip to attach items inside to the back mat. I also made one for my Grand-daughter for my G/Grandson, Liam. (see below)
My Grand-daughter can always change the items inside very easily.
The SVG Kit used is
Wet & Wild designed by Svgcuts.Com
I reduced the size of the kit files by 45% . I imported all of the files and selected ALL in my cutting software program. Then I reduced all of them at the same time. After cutting everything with my Silver Bullet cutting machine, I did the assembly. Putting the Sandcastle together was very easy to do. after everything was finished, I added glass beads into castle for weight and around the castle. You could also buy small shells and add those but I would recommend a larger frame. I decided what I wanted to cut for the title in vinyl and applied "Dream" to the front glass.
I then added a string of battery operated lights into the castle and LOVE the effect!
To me, this would make a great gift for someone! Housewarming?
Thank you for stopping by my Blog and I hope you will take the time to look at my
Etsy store.
Have a great week!
Judy Tesla Stark


